The Papercrafter's Nook Store

Friday, May 21, 2010

Handmade, Embossed First Holy Communion Moneyholder Card - Revisited!

Here's my latest card creation. It's another First Holy Communion Moneyholder card for that same co-worker who commissioned me to make one for her last time. (She must be booked up through the summer...LOL!)

For this project, I used my Ultimate Crafter's Companion to create a No. 10-sized card and matching sized envelope as pictured.

I embossed the Stampendous Calligraphy Cross stamp using the Ranger Inkssentials EmbossIt *acid free* clear embossing ink pad and the purple embossing powder from the Hampton Art a la mode Embossing Powder Set collection.

The envelope is made from Nana's Nursery cardstock pack of patterned paper.

For the final touch, I embellished this card using Offray ribbon.

Monday, May 17, 2010

Current projects...

I've been commissioned to make 2 personalized greeting cards recently. I'm making another First Communion card for a co-worker. This time it's for a girl. So, I plan to embellish this one more than the last.

Another is for one of our Papercrafter's Nook Facebook fans. She wanted a birthday card for her daughter like the "Princess Buttons" card I made for my niece.

I'm so excited to get started on these.

Of course, Father's Day cards are coming up. What plans does everyone have for Father's Day? Will you be making any handmade crafts or gifts for Dad?

Happy crafting!

Thursday, May 13, 2010

Graduation paper crafts?

What are you papercrafters out there doing for your grads? Are any of you making a scrapbook? What about a personalized handcrafted card?

Post some of your projects to the Papercrafter's Nook Facebook fan page!

Thanks and Happy Crafting!

Monday, May 10, 2010

Mother's Day card


Here's a Mother's Day card I made for this past Mother's Day. I used K&Company designer papers as well as K&Company Citronella Layered Accents (the flower in the middle of the card). For a finishing touch, I embellished the card with Island Blue Offray Ribbon.

Sunday, May 9, 2010

"Princess Buttons" Birthday Card

This Papercrafter's Nook card creation is called "Princess Buttons". My niece just turned 4-years-old. Naturally she had a princess-themed birthday party. I decided to use a lot of pinks in my handcrafted card for her. Cute little buttons added a nice touch. When she opened the card the first thing she said was "Buttons!" The "Celebrate You" stamp is embossed.

Saturday, May 8, 2010

Fabulous Floral Personalized Birthday Card & Coordinated Envelope

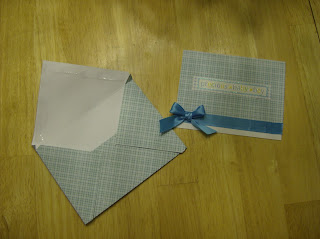
This is one of my latest birthday card creations. I'm particularly proud of how this one turned out. When I gave it to my sister-in-law, Lauren, she was absolutely impressed with the quality. More than one person who saw this card said it looked like a professional one they would purchase at Target or some high-scale card shop!

For you papercrafters who would like to replicate this sophisticated floral birthday card, just follow the directions below and add your own personal touches.

1.) Start by using a single sheet of 8.5 x 11 cardstock for the main piece of the card. I used beige for this card.

2.) Cut this cardstock sheet in half horizontally. You should have two equal-sized pieces. Fold one of the pieces in the middle. (Save the other piece to make another card another day! How's that for being eco-friendly - not to mention wallet-friendly?!) You should now have an A2 card size (4 3/8" x 5 3/4"). I used the ruler and cutting blade from my Ultimate Crafter's Companion tool to measure and cut down my cardstock.

3.) Pick a color-coordinated patterned sheet of paper to layer on the front of the card. I chose a floral patterned sheet of paper from my K& Company's "Best of K& Company Too" designer pack of 360 12 x 12 papers recently purchased from JoAnn's. I cut down the 12 x 12 floral patterned sheet of paper slightly smaller than the front of this card to reveal some of the beige cardstock beneath.

4.) Add ribbon. I cut down a piece of Brown Offray Ribbon and adhered it to the card on the horizontal edge between the patterned paper piece and the beige cardstock showing at the bottom of the card front. Double-sided tape works fine for this because it keeps the ribbon flat. I've learned not to use hot glue for adhering ribbon because the glue tends to make bumps show through the ribbon.

5.) Select two color-coordinated, textured cardstock sheets. Use these for the layered rectangular pieces on the card. I cut down pieces of hunter green and brown textured cardstock sheets from my Diecuts With a View textured cardstock pack for the rectangular layered pieces. The top layered beige cardstock rectangle piece is from the same cardstock used for the main card piece.

6.) Stamp and emboss the card. All of the stamps used on this card have been embossed using the Ranger Inkssentials EmbossIt clear *acid free* embossing ink with turquoise embossing powder from the Hampton Art embossing powder set. I heat the embossing ink and powder using the Darice Heat Tool.

7.) Embellish the card! I made a bow with the Brown Offray Ribbon using the Ultimate Crafter's Companion bow making tool. Makes perfect bows every time! The flower button came from my Autumn Leaves Foof-A-La Bag-O-Buttons Savannah Collection.

8.) Make a color-coordinated envelope. Trim a 12 x 12 piece of cardstock to 8 1/4" square to fit your A2-sized card. Find an envelope template online for folding instructions. I used my Ultimate Crafter's Companion envelope-making tool to create my envelope out of a 12 x 12 sheet of Nana's Nursery patterned cardstock.

9.) Take a picture of your final creation for your portfolio! Then, send your "new baby" along her way. (Every card creation feels like a "new baby" to me...)

Let me know what you think of this card. Leave your comments on the Papercrafter's Nook Facebook fan page or here on my blog!

Feel free to share your recent creations with the Papercrafter's Nook. Are you a crafter? You don't even have to be a "papercrafter" to be welcome here! All crafters are welcome!

Thanks & Happy Crafting!

Thursday, May 6, 2010

Personalized First Holy Communion Moneyholder Card!


One of my co-workers commissioned me to make her a First Holy Communion moneyholder card for her friend's son - Colin McCartney. For this project, I used my Ultimate Crafter's Companion to create a No. 10-sized card and matching sized envelope as pictured.

I embossed the Stampendous Calligraphy Cross stamp using the Ranger Inkssentials EmbossIt *acid free* clear embossing ink pad and the silver embossing powder from the Hampton Art a la mode Embossing Powder Set collection.

The envelope is made from Nana's Nursery cardstock pack of patterned paper.

Wednesday, May 5, 2010

Spotlight on Papercrafting Tools: The Ultimate Crafter's Companion

Not too long ago I purchased The Ultimate Crafter's Companion. So far, I've used it to make envelopes, boxes, greeting cards and enveloboxes. I know I haven't even scratched the surface in my use of this tool. There is a corresponding DVD that comes with this multi-use papercrafts tool. I plan to pop in the DVD soon and try out the more advanced techniques. I'll share those techniques with you in later posts. Stay tuned!

Have any of you used this tool? If so, what are your thoughts? What kinds of crafts have you made with it? If you have any pics of your creations using the Ultimate Crafter's Companion, please share them with us on the Papercrafter's Nook Facebook fan page!

Thanks and Happy Crafting!

Sunday, May 2, 2010

Baby Shower card

I made this baby shower card for a co-worker. I also made the coordinating envelope.
Related Posts Plugin for WordPress, Blogger...